Installation Tools
Essential - The Tools
What Could We Repair Today Without Special Tools?
Even for something as seemingly simple as replacing a phone or smartphone display, specialized tools are often required to unscrew tiny Torx fasteners. Over time, those of us who are handy tend to accumulate a variety of small tools that often end up buried at the back of the toolbox, rarely to be used again. However, some tools become indispensable over the years—universally applicable, well-crafted, and sometimes irreplaceable because they are no longer produced. Humanity has always relied on tools to perform tasks efficiently. While the earliest tools consisted of little more than a stick and a stone, today we have access to a vast range of thoughtfully designed, high-quality tools and machines that significantly simplify work processes.
Advancements in Tool Technology
In today’s world, there are countless types of tools that are constantly evolving. While basic tools like hammers and screwdrivers have maintained their traditional forms for millennia, the field of power tools sees continuous innovation. Not only are motors and battery performance being enhanced, but devices are also being optimized for usability and new functions. Established manufacturers who contributed to the early development of power tools remain active, as quality continues to prove its value.
The Necessity of Specialized Tools
When applying solar control films, we may not use many of the various power tools available on the market, but a reliable, straightforward heat gun is indispensable for achieving smooth and precise application of tint films on rear windows. Although minimal electrical tools are required for the installation process, the production of these precision-engineered films would not be possible without advanced machines and computer technology. The individual layers of high-tech films are only a few micrometers thick, making modern manufacturing techniques crucial.
Advances in Installation Processes
Installing solar control films on glass facades without a lift presents a significant challenge. Many of us, accustomed to using various tools and equipment, can hardly imagine having to erect scaffolding to apply films at dizzying heights. Even something as simple as grabbing a cordless screwdriver is much easier today compared to earlier times when one first had to locate an outlet. Modern technology and well-designed tools not only simplify everyday tasks but also make them safer and more efficient.
Development of Installation Tools
Trusted Tools Through the Ages
In our field, progress has not come to a halt. Time-tested tools like the trusty squeegee remain indispensable for film installers. Regular replacement of squeegees is essential since only tools with intact edges ensure consistent, high-quality application. While squeegees may now come in different colors or be made from new materials, their fundamental function remains unchanged. Some squeegees have been enhanced with additional features, making it easier to tuck film into the corners of small car windows or beneath seals.
Personal Preferences Matter
As in any other area, personal preferences play a key role in tool selection. While certain tools are designed for specific tasks, the philosophy of “to each their own” prevails. Browse through our product offerings, and you might just find the tool that perfectly complements your working style.
Basic Equipment for Film Applicators
A Knife or Cutter
Once the glass to be tinted has been measured, the selected film must be trimmed to size. A cutter with a high-quality, sharp blade is the best tool for this task. Using a cutting guide allows for precise and straight cuts, or you can follow the curves of the car window freehand. The quality of the blade directly affects the appearance of the installed film. A clean, precise edge speaks for itself, whereas jagged or uneven cuts not only look unprofessional but also leave a poor impression on clients.
A Pump or Pressure Spray Bottle
For optimal film application, it’s essential that the glass surface is free from dirt, dust, or greasy fingerprints. A pump spray bottle is a handy tool in this process. Typically, several bottles are used, each filled with the appropriate liquids, ensuring they are readily available when needed. High-quality window films often feature pressure-sensitive adhesives activated by water or a mounting solution. Using a pump spray bottle ensures an even distribution of the solution on both the adhesive side of the film and the glass surface.
The Squeegee
The squeegee comes in a wide variety of designs, all serving the same purpose: to remove mounting solution and air trapped between the film and the glass surface, ensuring a flawless finish without air bubbles. These squeegees are available in different shapes and materials. Some users prefer squeegees with handles, while others favor specially shaped models like the Conqueror or Reach Gold. For tight corners, a small tool like the well-known Lil’ Chizler is often indispensable. Preferences vary by user: some prefer softer materials, while others opt for harder ones. For curved glass, a flexible squeegee is recommended, whereas harder, larger squeegees work better for flat glass surfaces.
A Delicate Tool - The Glass Scraper
Who hasn’t experienced this? The glass appears clean, fingerprints are gone, yet something stubborn remains resistant to the cleaning cloth. Enter the glass scraper—a simple tool many are familiar with from the kitchen. For high-quality installations, a clean glass surface is essential for long-lasting adhesion. The glass scraper effortlessly removes old adhesive residues, ensuring the surface is thoroughly prepared before applying the new solar control film. Clients will appreciate the extra care taken to clean thoroughly after removing old films.
An Alternative or Supplement
Depending on the condition of the previously removed solar control film, stubborn adhesive residues may remain. In such cases, specialized cleaning solutions and high-quality scrubbing pads are invaluable, especially for larger surfaces, to effectively remove these residues.
Finally: The Rubber Blade or Squeegee
After all stubborn residues have been removed, the still-damp glass surface can be streak-free with a rubber blade. This ensures the glass is perfectly prepared for the application of solar control films.
Without the use of a mounting solution, it is impossible to position the film with millimeter precision and apply it bubble-free!
Essential - A Mounting Solution
Without the use of a mounting solution, it is impossible to position the film with millimeter precision and apply it bubble-free! Experienced installers know that a high-quality mounting solution is crucial for precise placement and seamless installation. Typically available as a concentrate, it can be diluted with a specific amount of water on-site. This solution not only reliably activates the adhesive but also allows for easy sliding and adjustment of the film during application. The moisture provided by the solution is essential for smoothing out the film without wrinkles or creases.
The Challenge of Curved Surfaces
Installing solar control film on curved glass surfaces highlights a significant challenge: the film must be pre-shaped to fit the curvature of the glass to avoid creases and bubbles. This process, known as "shrinking," is critical to achieving a flawless result and requires precision, patience, and the correct technique. Shrinking is accomplished through the careful application of heat, which softens the film, allowing it to conform perfectly to the shape of the glass.
A professional heat gun with an adjustable temperature range provides the necessary hot air, typically between 250 and 500 degrees Celsius. This temperature range is important, as it depends on the type of film layer, its thickness, and the glass's curved shape. Care must always be taken, as even a brief application of excessive heat can "burn" or distort the film. The rule of thumb is to work with less heat and more time to minimize errors. Experienced installers often rely on their expertise and intuition to determine the precise amount of heat needed to achieve optimal results without compromising the material.
The positioning of the heat gun is also critical to the shrinking process. It should be moved evenly over the film's surface to prevent heat from concentrating in one area. A controlled, uniform application of heat ensures that air bubbles are removed and a smooth surface is achieved. With enough practice, installers develop a sense for the right movements and distances, enabling them to shape the film perfectly.
Even a fraction of a second with too much heat during shrinking can "burn" the film—it's better to start with less heat and take more time to gain experience!
Avoiding Heat Damage
At a temperature of just 250 degrees Celsius, painful burns can occur on fingertips. Since installers often work close to the hot material during the shrinking process, effective skin protection is essential. To prevent heat damage, it is recommended to invest in heat-resistant Kevlar gloves. These not only protect against burns but also help position the film precisely onto the curvature of the glass while allowing for visual inspection during the shrinking process.
In addition to gloves, wearing safety goggles can help protect the eyes from potential hot air streams generated by the heat gun. A well-organized workspace and proper safety equipment are critical factors that not only enhance personal safety but also improve the overall efficiency of the installation process. Careful workmanship and good timing are crucial for applying the film seamlessly and without issues while avoiding injuries.
Installers should also ensure that the workspace is clean and tidy to avoid tripping hazards or distractions. Any craft process requires focus, and a disorganized work environment can hinder efficiency. Remember, only experienced installers equipped with the right tools and safety measures can achieve optimal results that look great and last for a long time.
Conclusion: The Importance of Choosing the Right Tools
It’s not just important to own good tools; they must also be used at the right moment and with consideration for the specific requirements of the task. Every tool has its unique characteristics and functions that make it particularly suitable for certain jobs. Of course, there are additional tools and accessories that are helpful and beneficial when installing window films. These include not only traditional tools like cutters and squeegees but also modern aids such as heat guns and specialized cleaning solutions. Over time, every installer gathers their own indispensable tools, often used daily and sometimes even self-made.
The quality and maintenance of tools play a critical role in the success of the installation process. Some tools will accompany you throughout your professional life, while others need regular replacement due to wear and tear. Continuously adapting and improving your selection of tools is essential for increasing efficiency and ensuring high-quality work. Even small differences in tool choice can significantly simplify the work process. For instance, using a lint-free cloth instead of an old rag can prevent annoying residues that might only become visible on the film later. Thus, careful planning and selecting the right materials are crucial!
In summary, choosing the right tools and using them promptly and skillfully is key to achieving professional results in film installation. Only by using the appropriate tools effectively can you ensure a smooth, undamaged, and long-lasting finish. A well-thought-out set of tools not only enables more efficient work but also enhances the satisfaction of both the installer and the customer. By carefully selecting and integrating your tools into your workflow, you’ll not only achieve high-quality results but also make the entire installation process smoother and more enjoyable. The right choice of tools is not just a matter of efficiency; it’s a crucial element for sustained success in your craft.
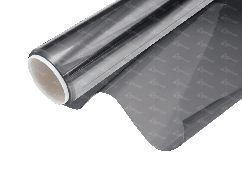
Sun protection films
Automotive films
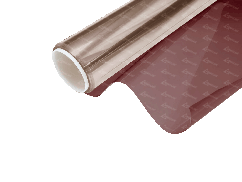
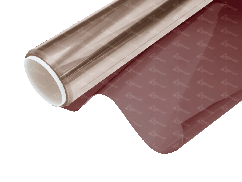
Architectural films
